Saturday, September 24, 2016

Monster Picture Day, kindergarten


We had school picture day recently and we made some mixed media collages of monsters as if they were dressed up for picture day as well. The results are just adorable and so funny!

We covered lots of concepts and skills, like color mixing, texture, craftsmanship, and working from our imaginations. On the first day, we painted two papers - one primary and one secondary that we mixed.
The next lesson we cut a large organic shape from one sheet for the body and glued it to the other, then used the leftover scraps for things like horns, arms, or teeth. On the last day of the lesson, we used a "fancy scrap" of scrapbook paper to make accessories like hair bows or neckties, and added texture with our construction paper crayons. That simple step of adding the crayon texture really made a big difference.


We had an art walk at the end of the third class, walking around to see everyone's art and offering compliments. It was a really wonderful time in the art room.


Friday, September 23, 2016

*VIP* Observation drawing part 2: contour

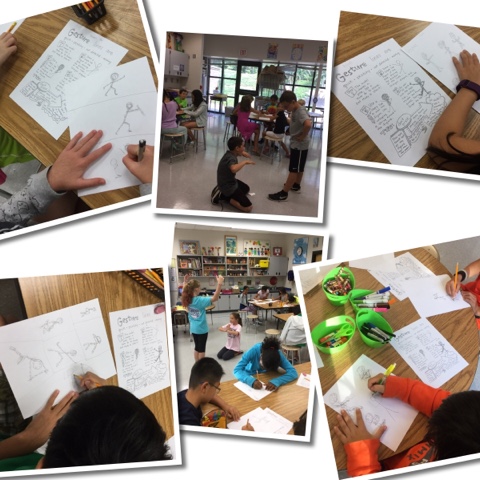
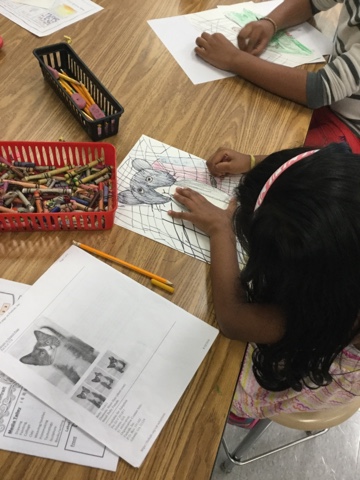
*Very Important Project* The second week of our observation drawing unit in 4th and 5th grade focused on contour line, which is the exact opposite of last week's gesture drawing exercises - gesture is fast, sketchy, and not detailed, while contour is slow, smooth, and shows details. Read about our gesture drawing in this earlier post. We drew objects from a box for the majority of our 45 minutes, and the kids really enjoyed the quiet focus. I emphasize that these are exercises, not complete artworks, although many are certainly worthy of hanging. We are trying to make an eye-brain-hand connection, so quiet focus is necessary. A few tips: keep going if you make a mistake, try overlapping and going off the page, try not to lift the pen.


At the end of class, we tried a blind contour portrait - still using the slow, smooth line, but not looking at the drawing at all, only at the subject, in this case a classmate model. This was lots of fun and I bet most of them went home and practiced on siblings!


The "on the head" method of blind contour is fun for a quick portrait, but using a paper plate "mask"  with a pencil hole in it is much more comfortable for a longer drawing session.

Contour drawing is a great way to begin a longer, more involved artwork. If you'd like to try this in your classroom, check out my Observation Drawing packet, available on Teachers pay Teachers. I have also just added a free download for the foil figure sculpture, which goes so well with this unit. https://www.teacherspayteachers.com/Product/Observational-Drawing-Gesture-and-Contour-exercises-2656125
Next up, we will continue to observe nature as we create some very artistic pumpkins in the style of Yayoi Kusama. Thanks for stopping by!


Thursday, September 22, 2016

Digital Portfolio Apps: A Collaborative Comparison Chart


Part of an art teacher's job is to make sure that their students artwork is displayed - brag about the happenings in your class, show students that art should be shared beyond the classroom walls. In the past, that meant that an art teacher would line the walls with beautiful art to show to the rest of the school. This is still a practice that many of us do. Many art teachers are looking to make the viewers of their classroom’s art be shared beyond the school walls. Using social media is one way to do that… another way to share art is through Artsonia, Seesaw, and/or Creatubbles.

Using apps to share art is HOT right now. How does an art teacher choose what platform to go with? We thought we would help with this question -  I will be sharing about the app Artsonia in this post. Nic Hahn of the awesome art ed blog MiniMatisse will share Seesaw information. Finally, Tracy Evans @EvansArtHouse, Matt Grundler @Artguy76, and Beth Carter @Bacarter77 and It is Art Day will be sharing on the web based tool, Creatubbles. This Creatubble team are art teachers from Texas who just happen to be valued members of my #PLN (Professional Learning Network) on Twitter.

Please click on the links in the paragraph above to read specifics about Seesaw and Twitter, and look below the chart to read my post about Artsonia.

Here is a helpful chart to compare the apps, so that you can best decide which to try in your classroom setting.


Let's talk about Artsonia!


Artsonia has been such a source of pride for my young artists over the last few years I have loved using Artsonia as a teacher for several reasons - it is an exciting way to show off the cool things we do in our classroom, including writing and integrated subjects. Also, students get a kick out of seeing their portfolio grow from year to year, and it fulfills technology and feedback/assessment requirements. Families love it because they can share with extended family globally and create a Fan Club for their little artists, complete with comments - there is even a fundraiser aspect that is no extra work for you!


This link will take you to a recent post that gives you a step-by-step guide to using the Artsonia app in Classroom Mode, meaning that the students are doing their own publishing; there is also a Teacher Mode for batch publishing by the teacher. http://dolvinartknight.blogspot.com/2016/08/get-your-class-publishing-with-artsonia.html  
You can also find information here on how to download your own Artsonia Station display, as seen in the pics above, or Seesaw Station and how-to handouts, as seen below.


Please feel free to ask any questions about getting your students started with Artsonia in the comments - thanks for stopping by!


Sunday, September 18, 2016

Landscape Reflections in 2nd grade


Second graders are finishing their fall-inspired landscape reflection watercolor paintings. They are really terrific! Here's a quick run-through of our steps:
1. Review "landscape" and show some examples that have a water reflection - find the line of symmetry. 

2. Brainstorm different types of landscape settings, like a neighborhood, a forest, a city - don't forget to mention the details.
3. Fold paper in half horizontally and draw a landscape in the upper half only. Trace with Sharpie.
4. Take folded paper to a light box or a window and press the sharpie side against the glass. Trace the drawing in pencil - when paper is opened, it will be a reverse reflection.


5. Ready for paint! Top half is painted with a warm color scheme to represent fall, which is only a few days away - artists are often inspired by the seasons. Bottom half is painted with cool colors, to represent the water reflection. Students may also use neutrals as they wish.
6. As students are painting, we review tips and tricks for good craftsmanship using watercolor.


I hope your first days of fall are as beautiful as our landscapes.


Thursday, September 15, 2016

*VIP* Observation drawing part 1: Gesture

VIP usually means Very Important Project in my classroom - something that I feel is crucial to our artistic development. Observation drawing, or looking closely to draw what you see, is not only an important skill for artists, but also for scientists, inventors, and detectives as well - really for anyone who needs to truly understand something. Learning to look closely, or seeing like an artist, is something that takes practice; these activities in my 2-part post on observation drawing are fantastic exercises. Part 1 focuses on gesture drawing and part 2, coming soon, will focus on contour - although these two techniques are opposites, they are both observational exercises.


I start gesture drawing with my 4th and 5th graders in the fall each year, and we go back to them often, as they are quick and don't require any prep and only a few materials. The kids LOVE doing them! To begin, we read and discuss the handout (available in my TPT store ) and I do a quick demo. A student takes an action pose, freezes, and we do a quick stick figure showing line direction of the figure, followed by a sketchy, loopy line that suggests form and movement. The whole thing only takes 30 seconds, and by the 3rd sketch, everyone has got it and they are loving it. We rotate posers and I count down the pose. 


Observational drawing packet from my Teachers Pay Teachers shop - includes vocab for both gesture and contour and printable, projectable handouts https://www.teacherspayteachers.com/Product/Observational-Drawing-Gesture-and-Contour-exercises-2656125

Another option is to use wooden mannequins or even sports figures from magazines. Again, start with a fast stick figure to show the line directions, then "flesh it out" with the loopy line, like you are wrapping a string around and around the figure.


In the past, we have turned these figures into Keith Haring style figures by adding a contour outline around the outside of the gesture and filling in with paint. We have also made 3-D versions using a sheet of aluminum foil. 


Coming up next will be part two, contour drawing - please check back soon!

Sunday, September 11, 2016

pet pARTners: Art with Heart


We have been having the best time with our community service project, pet pARTners! In case you haven't heard, my smartest artists are working to help solve the problem of homeless pets in our community by raising awareness of our local animal shelter, FurKids, through our artwork. We are posting the artwork on our school's social media and will display the original pieces in the community as well. Our goal is to bring in donations for food and care, and get more animals adopted into forever homes.
In addition to serving our community, which many artists do, we are expanding our drawing skills with careful observation and learning to break down complex forms into simpler geometric shapes. We are practicing good composition by filling the space and including negative space design in the background. We are thinking about how to present our work in the best way.
This will be an ongoing project and we will try out some different media in the next round of portraits. A portion of our Artsonia proceeds and our Artome show profits will be donated to the shelter at the end of the year. Please stay tuned and consider making a donation to FurKids or your own local shelter!

Students can access the FurKids site with current pet photos using our iPads. We also print out pics from the site that gives us a description of the pet's personality.