Stop and shop for fall savings! https://www.teacherspayteachers.com/Store/Mrs-Knights-Smartest-Artists
Pages
▼
Saturday, September 30, 2017
Sunday, September 24, 2017
Donuts for Days, 4th grade
My fourth graders are learning about form, value, and space in a two-dimensional artwork, so we chose a really fun topic to explore - donuts! We have looked often at the work of Wayne Thiebaud in my classroom for various projects - his paintings of bakery treats in repetition are so inspiring for art teachers and young artists. I also shared this student example found on Pinterest by Molly Curry.
How can we show space and form in our art? Value, placement, size, and overlapping. Here's what we did.
After a quick value scale activity, we started with a small black and white study of a single donut on an index card, focusing on value. Because we were using pens, we couldn't blend like we do with pencil so we used hatching techniques instead. Then we started a larger piece with rows of donuts, larger at the bottom, and smaller as they go up the page. Overlapping helps the illusion of space. This time, instead of black and white value, we made values of colors by changing our coloring pressure or by blending with our Crayola Twistables. I just bought some of these for the first time after trying them out at my friend Mollie's art room. They have a different feel than regular crayons - we are liking them so far!
We finished these off with some cast shadows, and finally some decorations on top with colored sharpies. For our reflection time, I am planning to surprise them with some real donuts to celebrate their good work!
Composing with shapes in second
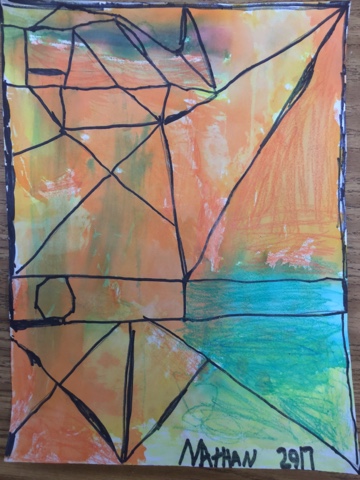
We learned about geometric and organic shape in second grade, and created a composition that used both. We filled in our negative space, or background, with torn pieces of tissue paper and water. These are organic because they have uneven, irregular edges and can change, unlike geometric shapes which have rules - for example, a square has to have four even sides that are straight. An organic shape such as a cloud or a puddle can change all the time.
Once the papers have dried and we peel the tissues off, it's time to start the geometric shapes. Using a cardboard straight edge and a sharpie, we draw straight connected lines by connecting randomly placed dots. We fill the page and add a few colored shapes for interest, choose an orientation and sign the corner! Creating compositions is fun when you have a variety of tools to work with.
Thanks to Elizabeth Lyle @e_lyle on Instagram for posting the inspiration for this lesson!
Thanks to Elizabeth Lyle @e_lyle on Instagram for posting the inspiration for this lesson!
Sunday, September 17, 2017
Beautiful Oops, first grade
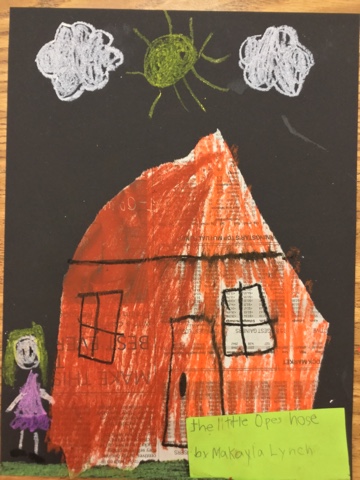
Beautiful Oops is an inspiring book for young artists, encouraging "happy accidents." The book is filled with could-be disasters in the art room - stained, torn, wrinkled, ripped paper - that transform into magical works of art, using just a little creative thinking. It was a fun activity for early in the year - we loosened up and had fun with our torn newspaper! We learned about organic shapes and their irregular, curved or uneven sides - these shapes don't have to follow rules like the geometric shapes do. Clouds, wiggly worms, and puddles are great examples of organic shapes. After reading the book and choosing our scrap, we practiced a bit by tracing our scrap on paper and sketching our plan. The second week we painted the actual scrap and finally we mounted our work and added a title. Such a fun creative thinking project - thanks Barney Saltzberg for a great book!
Unicorn Oops
Rainbow Oops
The wold oops
Swordfish deep down
Meat Oops ( love this so much!)
The Beautiful Oops house
Pizza Oops
Fish Oops
Loose tooth Oops - ha!
Pond Oops
Color Teapot oops
The little Oops house
Saturday, September 16, 2017
Kindergarten Owls - solving a mystery
This activity is always so much fun and I love seeing the expressive, unique owls each student creates. We start with a mystery drawing, where I give clues and the students draw along and try to figure out the mystery from the clues - it is a great way to build drawing confidence in these young artists. More on mystery drawings at the bottom of this post!
Once we solve the mystery, students experiment with lines and patterns to show texture, as well as trying out and comparing different drawing/coloring tools. I also encourage students to make fun and creative choices with color and detail at this stage - reminding them that they are artists who get to decide how they want things to look. While we are working on this, we talk about some scientific connections such as the nocturnal lifestyle of owls. Most students are familiar with this and love sharing what they know as we color away.
Once the drawings are complete, we have a class discussion about the importance of a title and how a title can help explain what is happening in an artwork. We share a lot of ideas for descriptive words for the setting and the mood and the owl's appearance.
 If you're interested in trying out my mystery drawings, I have two sets available in my Teachers Pay Teachers store - the owl is in the first set and my second set, called "Mystery Drawings Round 2," has five new subjects. https://www.teacherspayteachers.com/Store/Mrs-Knights-Smartest-Artists


